|
April 30th, 2006
This
project started as a thought back in September, 2005. I
mentioned the idea to a friend, while I was in Brazil, who
suggested to me that, before spending any time on the project, I
should contact Clive Chapman at Classic Team Lotus. To
find out what, if any, requirements CTL had, to enable me to
proceed.
As most
of you will know that have been visiting the website and keeping
up with the News.
In 2006 Clive Chapman gave permission
for me to proceed, and said he could see no problem in granting
me a license to produce the kit, and trans-kit in
1:12.
Before I
can put the models into production I have to send samples and
photographs to CTL for approval.
There was
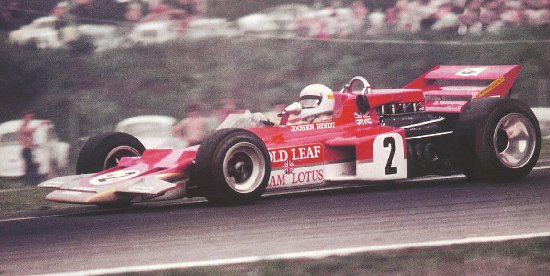
a Lotus 72 at the Classic Team Lotus workshops, being worked on.
Chassis number 72/5, which in it's first incarnation was a 72C,
first driven by Emmo, who was testing it and was supposed to
hand it over to Jochen for the race. However, Emmo crashed
it in practice and it could not be repaired at the track so was
shipped back to the factory for repair. It was the same race
that Jochen lost his life at.
The
present incarnation of chassis 72/5 (it is the chassis that
was eventually given to Emmo as one of his permanent race cars) is the 1973 72E, with the fiberglass or "deformable bodywork" as
opposed to the aluminum (aluminium) bodywork of the 72C and
earlier 72D.
I have
started re-creating 1:12 scale drawings from the prints of
originals, I was loaned by CTL. There are a lot of
drawings to do. I will produce them first then start
making the prototype parts from them, just to make sure I have
done it correctly.
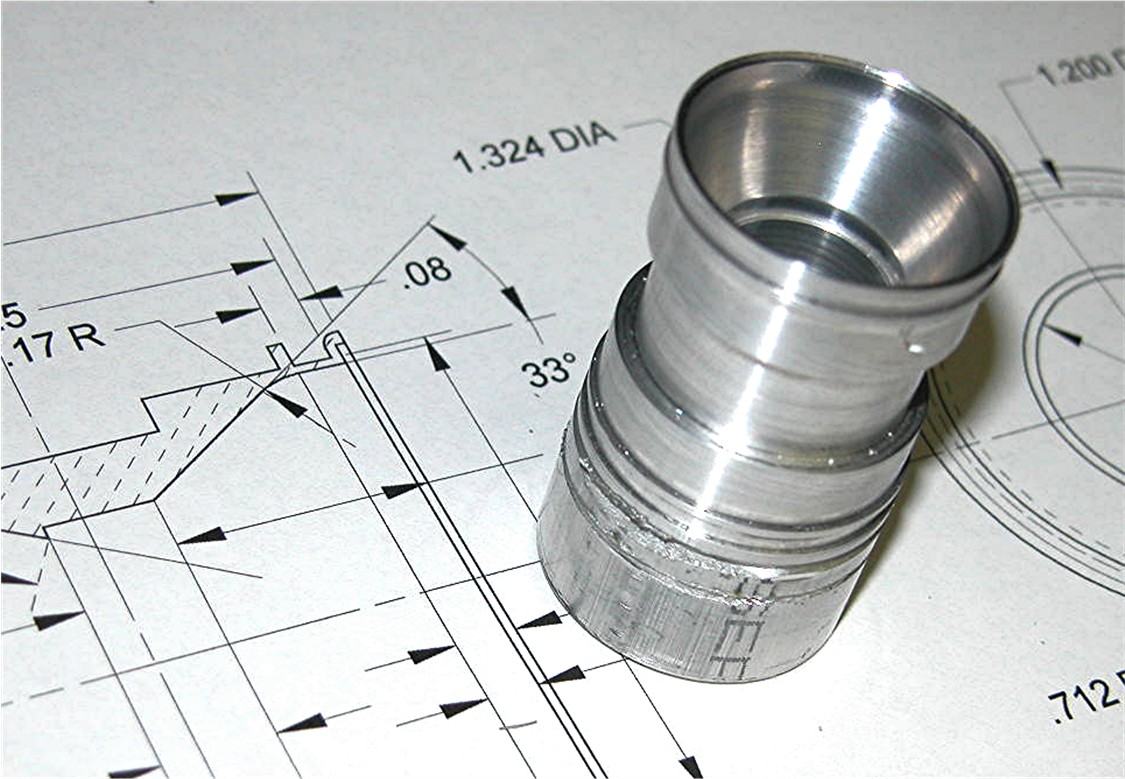
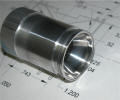
I have
actually started on the rear wheels, and found a
 problem,
which is an easy fix I was not thinking.....duh! I
am actually making a PURE 1:12 scale model and not a Close to
1:12 scale so the wheels are scaled for 15" diameter. (Which I'm
sure all the other Tamiya models were, well I assumed were) So I
used the same size bar stock that I did for the McLaren.
Unfortunately it is the wrong overall diameter. No big
deal as the purpose was to find mistakes the rest of the wheel
is correct......almost.....except for the lip on the rim which
is smaller as well because of the wrong size stock. But the
drawing is correct, which is the important part. problem,
which is an easy fix I was not thinking.....duh! I
am actually making a PURE 1:12 scale model and not a Close to
1:12 scale so the wheels are scaled for 15" diameter. (Which I'm
sure all the other Tamiya models were, well I assumed were) So I
used the same size bar stock that I did for the McLaren.
Unfortunately it is the wrong overall diameter. No big
deal as the purpose was to find mistakes the rest of the wheel
is correct......almost.....except for the lip on the rim which
is smaller as well because of the wrong size stock. But the
drawing is correct, which is the important part.
 I have taken the liberty of
not machining the outside of the rim as the real wheels, for the ease of
manufacturing. After all they are going to be covered with
tires. I may actually produce a few bare wheels for people
that want some for a diorama, but not now.
I have taken the liberty of
not machining the outside of the rim as the real wheels, for the ease of
manufacturing. After all they are going to be covered with
tires. I may actually produce a few bare wheels for people
that want some for a diorama, but not now. I have a
company in Phoenix that will be producing all the photo etch
parts for me. A very well known company in Japan will
probably help in producing some very small machined parts for me. I think I
will produce the engines and all other parts myself, to try and
keep the costs down. With the exception of the tires.
There is a company in Brazil that will look at the possibility
of producing them for me, but I have to make the pattern first. There
will be a lot of metal parts. The details will include
rack and pinion steering, working suspension and miles of wires
and pipe work. The air-box will be removable, and maybe the
windshield. Talking of which, I am trying to locate some
clear, yellow tinted plastic sheet for the windshield. If
anyone knows of a source, please email me
mac@macsmodeling.com
(I did find a source but the minimum
order is approx. $14,000.00!) The body,
nose, air-box and wing elements will be produced in resin, the
wing end plates and seat tub will be aluminum. It will
be a while before many parts are actually made, but once I am at
the stage of making parts, they will come quickly. All the
prototype patterns and parts will be made from scratch by my
fair hand. |
|
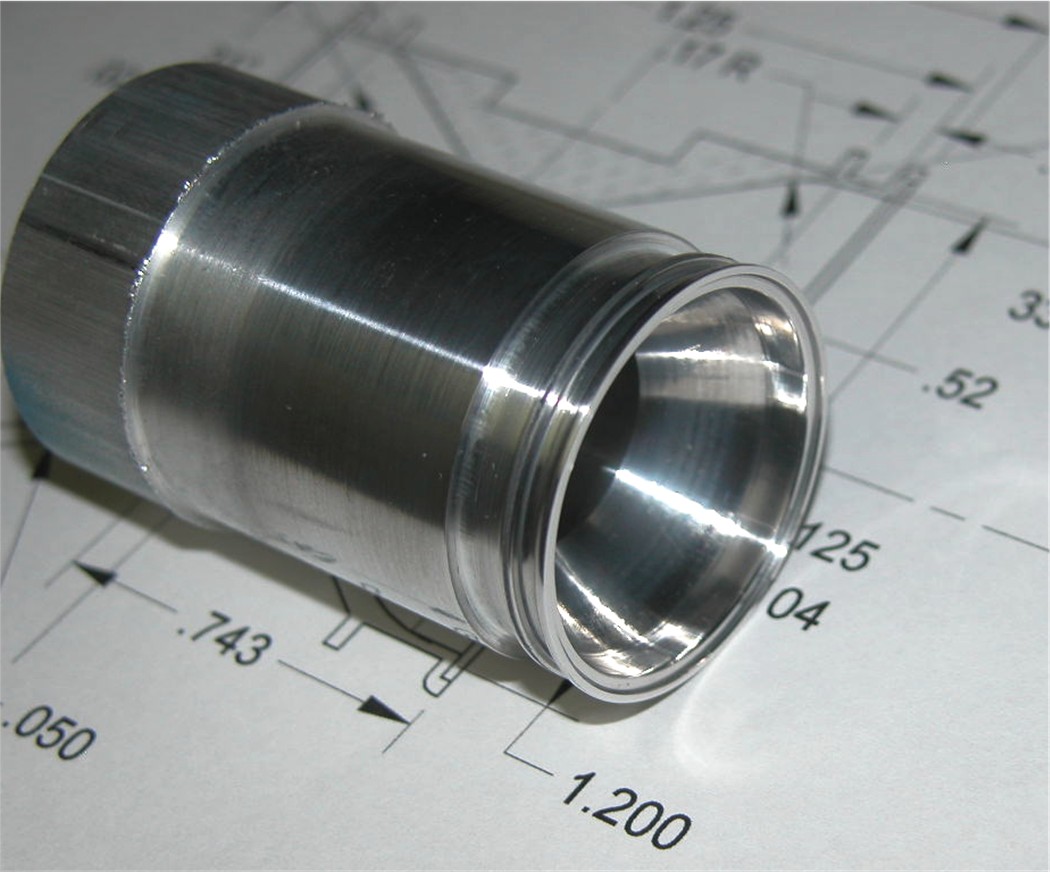
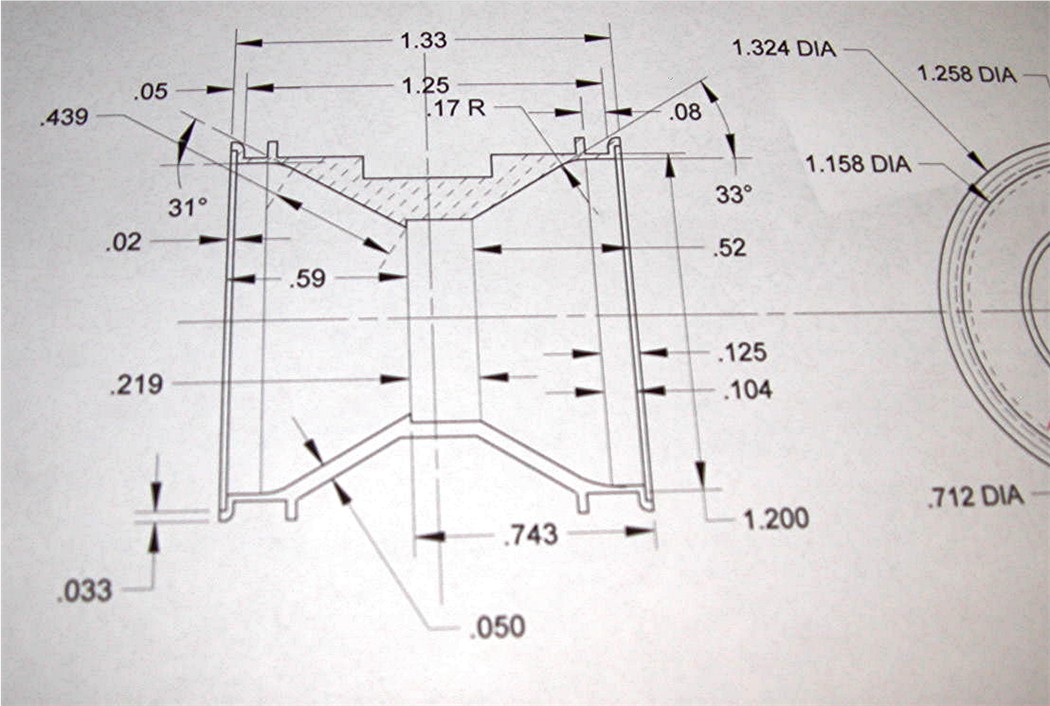
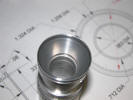
May 4th.
What a difference a couple of days make and the correct bar
stock.
 Correct size lip and even looks better. :) It's hard to
see, but even the radius on the inside of the outer lip is
there, just like the real one. It's easier to see on the
drawing.
Correct size lip and even looks better. :) It's hard to
see, but even the radius on the inside of the outer lip is
there, just like the real one. It's easier to see on the
drawing.
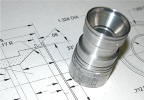
 I now have to make a jig to
hold the wheel so I can machine the other side of it. The side
that will be seen.
I now have to make a jig to
hold the wheel so I can machine the other side of it. The side
that will be seen.
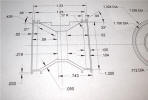 This is two concepts on one drawing, of how I should make the
rear wheels look. Now imagine a drawing similar to this
for all the other parts of the car........you will get the idea
of what detail is going to be on the kit.
This is two concepts on one drawing, of how I should make the
rear wheels look. Now imagine a drawing similar to this
for all the other parts of the car........you will get the idea
of what detail is going to be on the kit.
May 18th.
Just so you know, I have been working on the kit. There is
just nothing I can show at present. Or nothing I want to show
yet. :)
I have produced the drawings
for the rear wing elements and end plates. And just finished
working on the drawings for the front sub-frame. It is a
lot of hard work, but a lot of fun.
I have also been laying out
a lot of the brackets so I can produce plates for photo etching.
I am trying to fabricate the
prototype parts in such a way that they can be reproduced, but
also give the modeler something to do, not just take it out of
the box and put it together.
As I am making the drawings
I can see how easy it would be to make the parts if I was just
making one model, but for a production run it is very different.
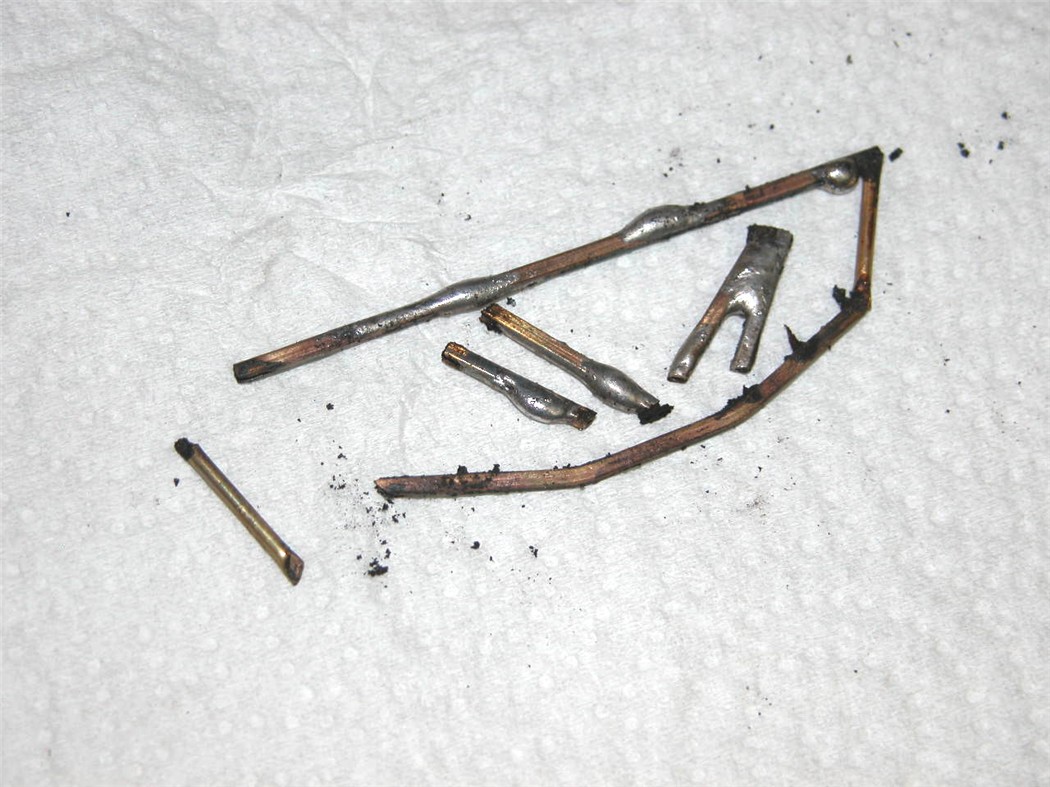
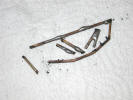
May23rd.
Well I managed to cut all the pieces to make the front sub-frame
as I wanted, very happy with the result.
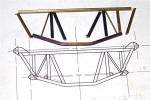 Parts over the drawing of how I want it to look. Just for
reference you can see here
Parts over the drawing of how I want it to look. Just for
reference you can see here
 the detail I want.
The tool that helped, my
miniature chop saw from Harbor Freight
 $20.00
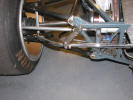
Everything went well; I
decided I was going to assemble the parts, with a little super
glue to tack it all together then solder it. Seemed like a
good idea........this is where you learn it's not all fun and
roses. (Unlike a photographer that takes 100 pictures and
only shows the 1 good one.) I'm letting you see the
problems as well.
Heartache!
 Super glue does some weird $h!t when heat is applied, but more
importantly, it does not allow the flux or solder to flow, it
irrupts like a volcano and creates a great mess and some pretty
toxic smelling fumes. Perseverance is not the correct
procedure, I have a pretty good cough today and that mess in the
picture.
Super glue does some weird $h!t when heat is applied, but more
importantly, it does not allow the flux or solder to flow, it
irrupts like a volcano and creates a great mess and some pretty
toxic smelling fumes. Perseverance is not the correct
procedure, I have a pretty good cough today and that mess in the
picture.
Rather than clean up the
pieces I think I will just remake them. (update
11/25/07, the sub frame is wrong for the 72C and has to be
remade.)
I am going to use a little
known "Modelers License" and the kit will come with the two
different rear wing end plates, but I'm only going to supply the
later wing elements. Not a lot of difference to the eye,
but far more adjustable for any part of the year.
Continued on
Page 2 |